Windows Defender Exploit Guard – Windows 10 New Security Features EG
Microsoft has released a new “Windows 10 Fall Creators Update” 1709 version, the update comes with a new set of magnificent security improvements which are very important to me to elaborate and presenting them to you.
What’s going to be over this article?
I am going to show how to apply these features, what they are, requirements, and any details that can help you for implementing them.
Strongly do not recommend deploying them immediately, check them in the LAB environment, ensure they are meet your requirements and expectations and then take them online.
Administrative Templates (.admx) for Windows 10 Fall Creators Update (1709)
https://www.microsoft.com/en-us/download/details.aspx?id=56121
The following features are available on “Windows 1709″ versions, it’s already available for downloading and installing, you can deploy that update using SCCM or just approve for installing in the WSUS, in additional, you can download it on your own PC – go to Windows update and run re-check updates.
So as mention, Microsoft brings the Windows Defender EG as new security set which consists the following pillars:
Exploit Protection: Remember the EMET? So it’s pretty same, they have combined some EMET features into Exploit Protection- preventing threats that using vulnerabilities to get access to our devices, whether on the network level, or device hardware.
Attack Surface Reduction: As per your rules, helps us to allow mitigation of infection vectors in Office, blocking Powershell VBS and java scripts from running,
Network Protection: Reducing the exposure of our computers from network and web infection vectors.
Controlled Folder Access: Prevents unknown applications and ransomware encryption malware from writing to the specified folders.
| Feature Name: | Windows Defender Antivirus | Windows Defender ATP license: |
| Controlled folder access | No requirement | Required for reporting in the Windows Defender ATP |
| Exploit protection | Real-time protection | Required for reporting in the Windows Defender ATP |
| Attack surface reduction | Real-time protection | Required for reporting in the Windows Defender ATP |
| Network protection | Real-time protection | Required for reporting in the Windows Defender ATP |
Let’s discuss them:
The Attack Surface Reduction knows protecting us against the following attacks:
- Executable files and scripts used in Office apps or webmail that attempt to download or run files
- Scripts that are obfuscated or otherwise suspicious
- Behaviors that apps undertake that are not usually initiated during normal day-to-day work
When you enabled this feature and a user trying to open an affected email, the ASR will block the email and notify the user that this attachment contains malicious info.
ASR Requirements:
- Windows 10, version 1709 (and later)
- Microsoft Office 365
- Microsoft Office 2016
- Microsoft Office 2013
- Microsoft Office 2010
Each rule has kind of ID, using this ID you are applying the group policy rule GUID- Follow the table:
Block executable content from email client and webmail:
BE9BA2D9-53EA-4CDC-84E5-9B1EEEE46550
Block Office applications from creating child processes :
D4F940AB-401B-4EFC-AADC-AD5F3C50688A
Block Office applications from creating executable content:
3B576869-A4EC-4529-8536-B80A7769E899
Block Office applications from injecting code into other processes:
75668C1F-73B5-4CF0-BB93-3ECF5CB7CC84
Block JavaScript or VBScript from launching downloaded executable content:
D3E037E1-3EB8-44C8-A917-57927947596D
Block execution of potentially obfuscated scripts:
5BEB7EFE-FD9A-4556-801D-275E5FFC04CC
Block Win32 API calls from Office macro:
92E97FA1-2EDF-4476-BDD6-9DD0B4DDDC7B
If you want to exclude certain folders or files that contain malicious behavior, you can do that using Powershell or GPO
Excluding:
Windows components > Windows Defender Antivirus > Windows Defender Exploit Guard > Attack surface reduction:
Exclude files and paths from Attack surface reduction Rules:

Powershell > Exclude file or folder:
Add-MpPreference -AttackSurfaceReductionOnlyExclusions "<fully qualified path or resource>"
How to configure ASR:
Open your Group Policy and navigate to:
Windows components > Windows Defender Antivirus > Windows Defender Exploit Guard > Attack surface
Double-click the Configure Attack surface reduction rules setting and set the option to Enabled. You can then set the individual state for each rule in the options section:
- Click.. and enter the rule ID in the Value name column and your desired state in the Value column as follows:
- Block mode = 1
- Disabled = 0
- Audit mode = 2
You can enable the ASR feature in “Audit Mode” which can help you to record the ASR behaviors by viewing the events in the “Event Viewer “– SUGGESTED!
To enable audit mode use the following PowerShell:
Set-MpPreference -AttackSurfaceReductionRules_Actions AuditMode
The logs Event ID’s are:
5007 Event when settings are changed
1122 Event when rule fires in Audit-mode
1121 Event when rule fires in Block-mode
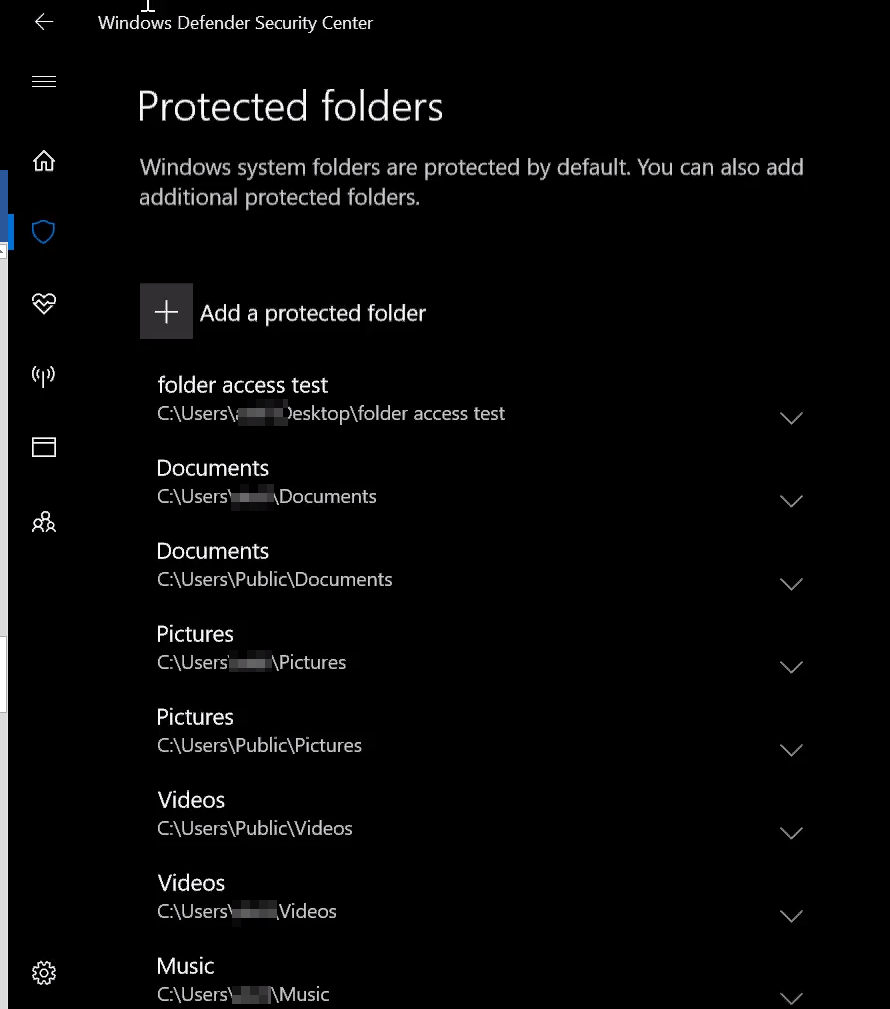
CFA- Controlled Folder Access, – “Designed to slow down ransomware”
which manageability available with Windows Defender Security Center app, Group Policy, PowerShell, Configuration service providers for mobile device management knows to help us against ransomware.
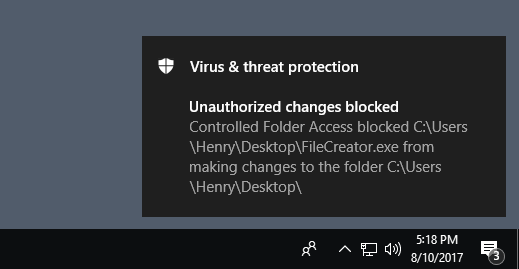
App, files, executable file and others are evaluated with Windows defender and thus existing files are known as malicious or safe, you have the control, you decide what is allowed to make changes to the files in any protected location, it means that if you add your desktop folder to the CFA as safe location, ransomware may try to encrypt your files on your desktop, however the CFA blocks it from running and doesn’t let it make changes at that specific location. – it works with AV exclusions.
As well as the user will get notification of CFA, about attempting to make changes, you can customize the notification.
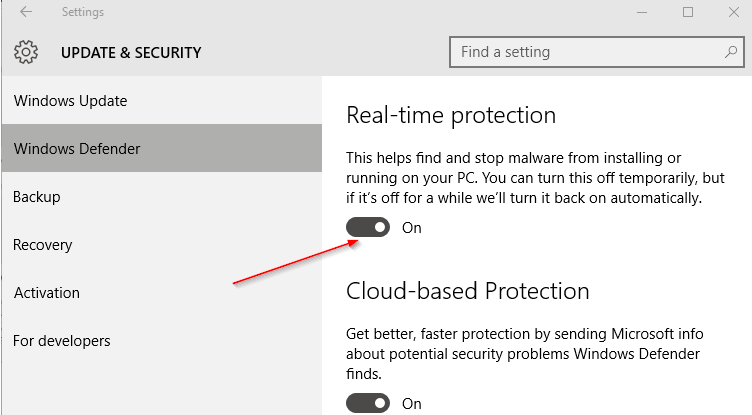
You can get this feature provided that you enable the “Real-Time Protection” in Windows Defender and your OS is Insider Preview build 16232 or later dated July 1, 2017
On a specific computer:
Add Folder protected in “Windows Defender Security Center“:
How to enable the Controlled Folder Access GPO:
Configure the Group Policy to enable CFA
- Open the Group Policy Management and go to Computer Configuration.
- ClickPolicies > Administrative templates.
- Expand the tree toWindows components > Windows Defender Antivirus > Windows Defender Exploit Guard > Controlled folder access.
Double-click the Configure Controlled folder access setting and set the option to Enabled. In the options section you must specify one of the following:
Enable – Malicious and suspicious apps will not be allowed to make changes to files in protected folders. A notification will be provided in the Windows event log
Disable (Default) – The Controlled folder access feature will not work. All apps can make changes to files in protected folders.
Audit Mode – If a malicious or suspicious app attempts to make a change to a file in a protected folder, the change will be allowed but will be recorded in the Windows event log. This allows you to assess the impact of this feature on your organization.

Enable this using Powershell:
Set-MpPreference -EnableControlledFolderAccess Enabled
The Notification:
- You can customize which folders do you want the CFA will be protected or not.
Network protection:
Responding to the macro that tries to establish external communication with the attacker,
What does it mean? Let’s suppose you have a macro that runs on your computer and started to encrypt your files, transferring data from your computer to own attacker computer; communication has been initiated between source to destination, using this policy you are blocking the communication between compromised computer to the attacker.
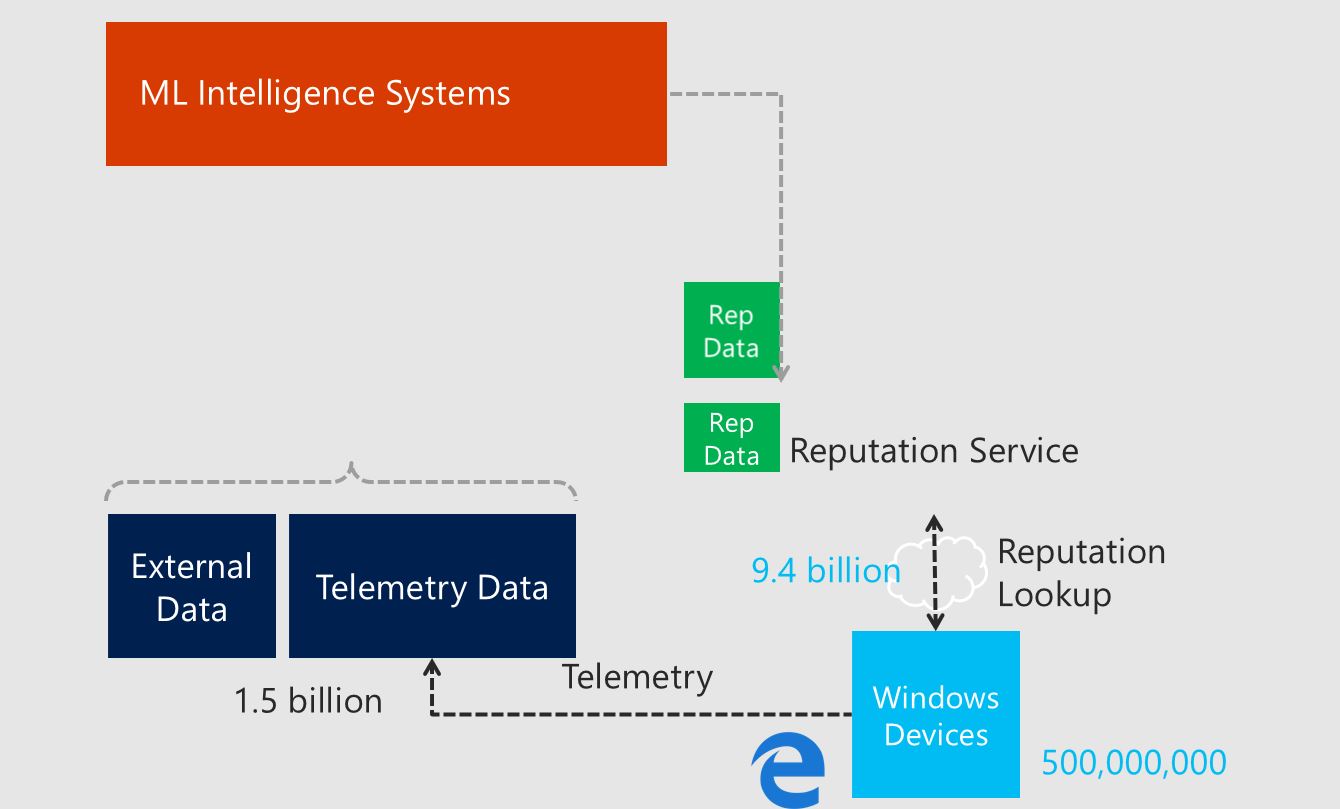
Along with that, it uses on “SmartScreen “abilities and blocking dangerous outbound websites and traffic, if there is a website that considers as dangerous (e.g., phishing, scams, malware) you won’t be able to access it.
The Network Protection supports to all browsers: Google Chrome, Edge, Firefox, Opera.
The Network Protection checks the URL reputation in the Cloud intelligence and knows what exists behind those URLs and checks the IP and Hostname, Windows servers downloading local cache for fast lookup.
It works on mobiles as well, even if the end user is not on the corporate network.
* Microsoft Technet
How to enable this?
Powershell: – You can deploy this script using GPO, SCCM, PSXECE.
Set-MpPreference -EnableNetworkProtection Enabled
Group Policy: an additional option that recommended to enabled.
- On your Group Policy management machine, open the Group Policy Management Console, right-click the Group Policy Object you want to configure and click Edit.
- In the Group Policy Management Editor go to Computer Configuration.
- ClickPolicies then Administrative Templates.
- Expand the tree toWindows components > Windows Defender Antivirus > Windows Defender Exploit Guard > Network protection.
- Double-click thePrevent users and apps from accessing dangerous websites setting and set the option to Enabled. In the options section you must specify one of the following:
Note:
In order to completely enable the Network protection feature, you should set this policy to Enable and also selecting “Block “in the drop-down menu.
Requirements:
Windows Defender AV real-time protection and cloud-delivered protection must be enabled
Insider Preview build 16232 or later (dated July 1, 2017, or later)
Exploit Protection
Exploit Protection is part of exploit guard set as well,
Hopefully, you remember the EMET (Exploit Mitigation Experience Toolkit), so the Exploit Protection and EMET are pretty similar.
- Exploit protection helps protect devices from malware that use exploits to spread and infect. It consists of a number of mitigations that can be applied at either the operating system level or at the individual app level.
Enable this using Powershell:
- PowerShell in the Start menu, right-click Windows PowerShell and click Run as administrator
- Enter the following cmdlet:
PowerShellCopy
Set-ProcessMitigation -Name iexplore.exe -Enable DisallowChildProcessCreation
How to enable it on your own device:
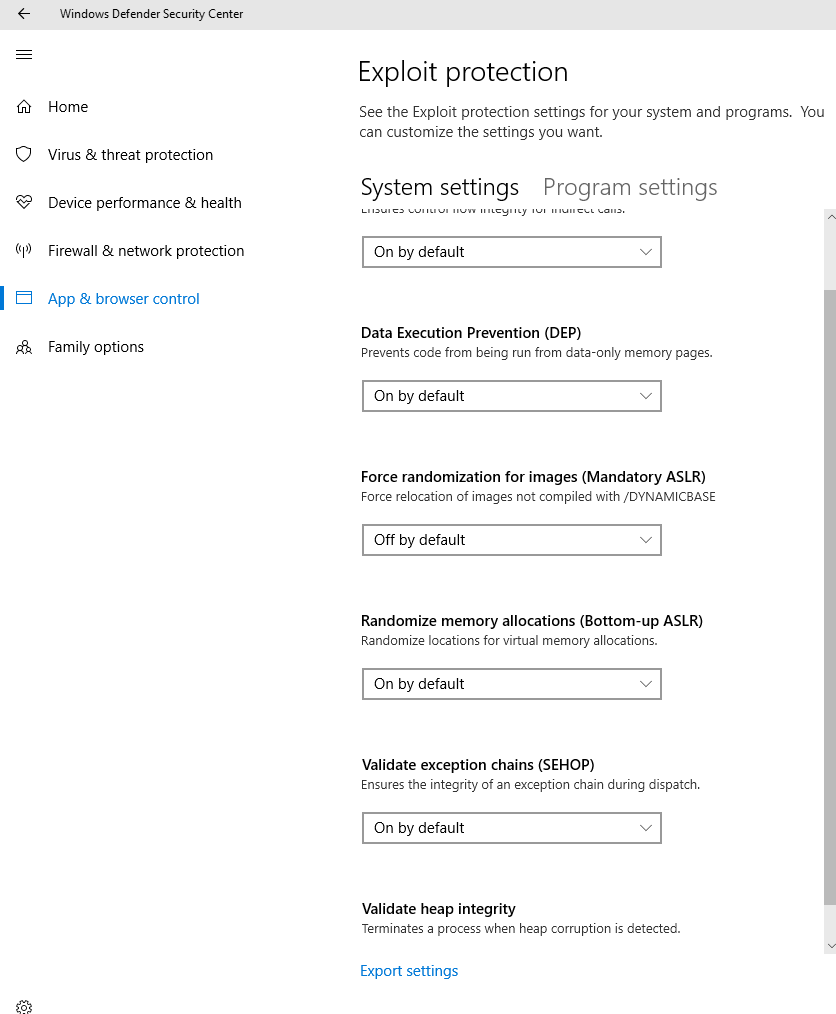
In order to understand each policy setting in the Exploit Protection I would suggest referring to this URL:
https://docs.microsoft.com/en-us/windows/threat-protection/windows-defender-exploit-guard/customize-exploit-protection
DEPLOY WINDOWS DEFENDER EXPLOIT GUARD USING SCCM:
https://www.pelegit.co.il/deploy-windows-defender-exploit-guard-using-sccm/
You can create and deploy an Exploit Guard Polices with you System Center you version should be “System Center Configuration Manager (Current Branch)”
Do you want to test these features and make sure they are working? You can confirm the ASR, CFA, NP, EP, working properly on your computer? Use this website:
https://demo.wd.microsoft.com/?ocid=cx-wddocs-testground
Let’s sum up, Microsoft definitely improved with regards to security field; it looks like that it is just a matter of time until they actually end up third-party anti-virus software, nowadays, Microsoft offers a huge security package which includes EG, Office 365, ATP, Windows ATP, ATA, and more.
These features certainly going to secure your environments, you can enable these feature with existing 3rd anti-virus software, guys please, be careful, don’t implement these settings without checking them deeply, As deep as possible of these settings.
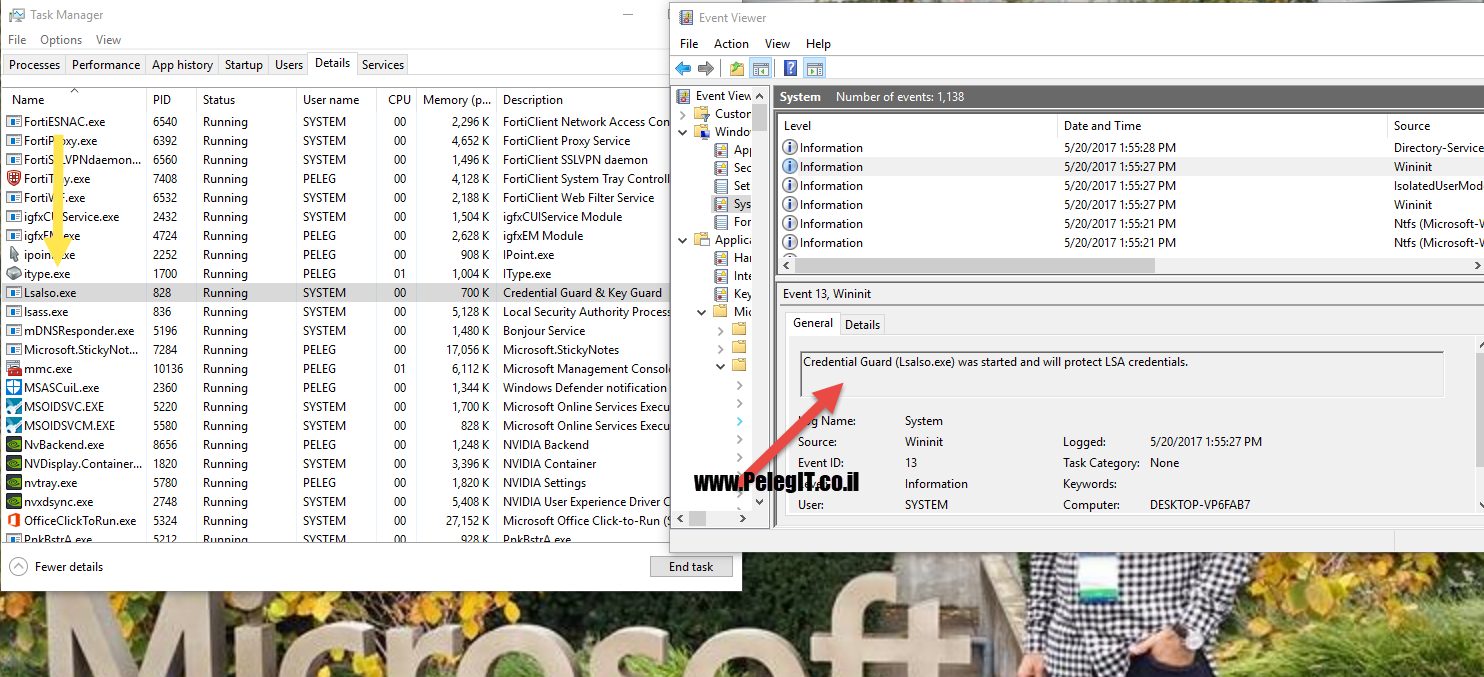
Alright, so if you are going implement these features do not forget to take into your consideration that Credential guard and Device Guard are also important not less security feature above: